

How To Build Garden Obelisk
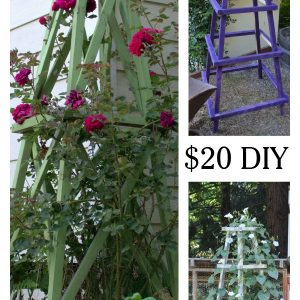
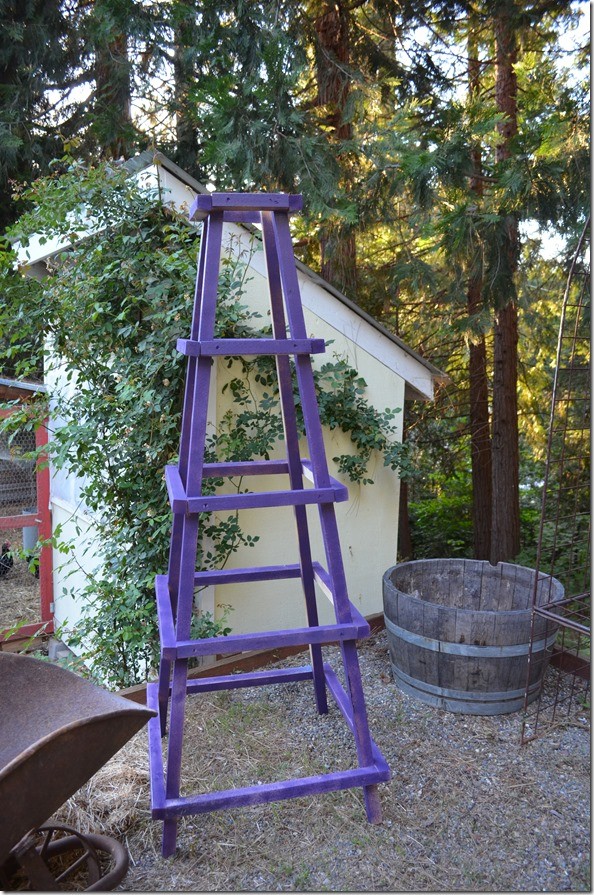
Easy Garden Obelisk – a great and inexpensive DIY! This obelisk can be used in your garden for roses, sweet peas or even squash . Some call these Tuteurs but they are the same.
There is so many things you can use this easy garden obelisk for. I have made an arbor from them for my Secret Garden. Last year I used it as a tomato cage, it worked great! Plus it was so much prettier than my wire support cages.
Why do I call it easy?
Because unlike many of the obelisk plans I found online this one has no angle cuts yet looks great in the garden. It gets covered with vines, canes and other plants that steal the show and you don't really notice how the obelisk is built.
I need fast and easy with my DIY's and this fits the bill. What is so wonderful is anyone who can hold a screw gun can put this together.
Don't have a saw? Many big box home improvement stores will cut the lumber for you.

Disclosure: This post may contain affiliate links, meaning I get a commission if you decide to purchase through my links, at no cost to you. Please read my disclosure for more info.
Just FYI: When we first built this the cost was just under $20 for materials. Building materials have shot up in price in 2021 and it may cost you more. Prices are relative to your locale as well.
Materials to build Obelisk
- 8 8 ft 2 x 2's (usually pine or fir)
- 3 inch wood screws
- Exterior wood glue
Obelisk Cut list
Legs 4 – 2 x 2's @ 72 inches long
Rungs for ladders – 2 pieces each at:
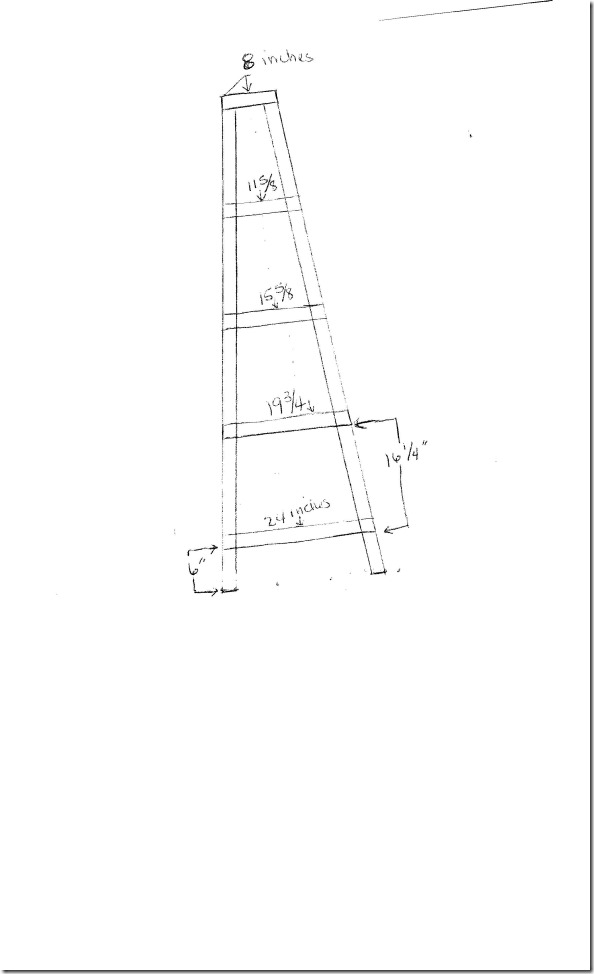
- 8 inches
- 11 5/8″
- 15 5/8″
- 19 3/4″
- 24″
Side rungs to attach ladders together 2 pieces each at:
- 11″
- 14 5/8″
- 18 5/8″
- 22 3/4″
- 27″
There is a printable card below with the materials listed.
Please see this post for a alternate material for cross pieces and a nailing or screwing pattern to prevent ratcheting!

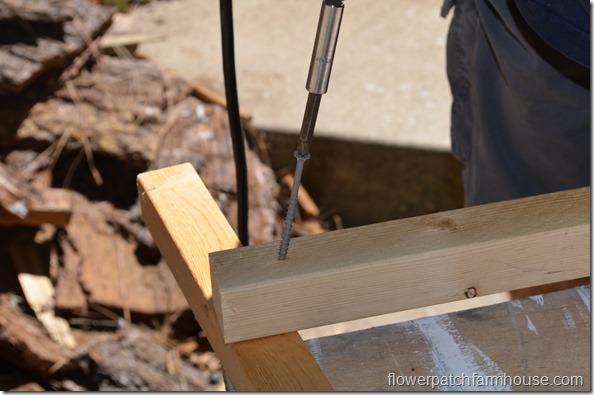
Important: Pre-drill holes for screws. This will prevent splitting of the wood. Use a smear of wood glue at the juncture of each piece for added durability. Since this is an outdoor item it should be an exterior wood glue.
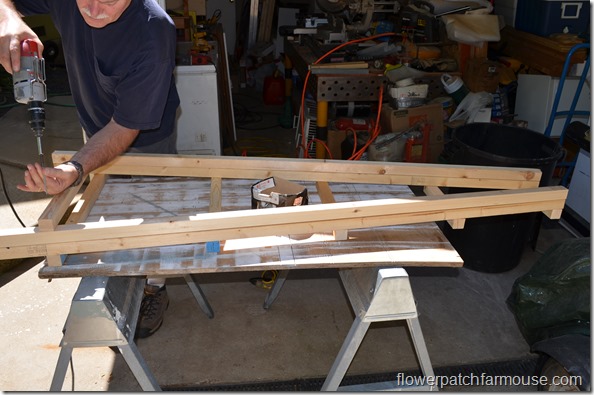
Build first side of obelisk like a ladder
Start by building the first "ladder".
Lay 2 of the 72″ pieces on a flat table or surface. We used the edge of our makeshift table as a straight edge.
Measure up 6″ from the bottom of both legs (72″ pieces) for placement of the bottom rung or crosspiece.
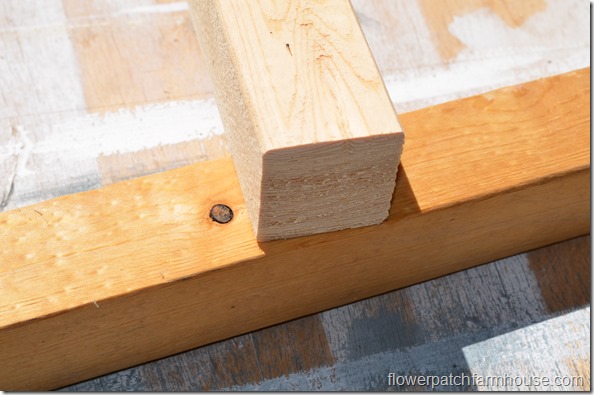
Since the legs are at an angle and the cross pieces are cut square only line up the top corner to the edge of the leg.
Next fasten the top piece in placeStart (8 inch piece)
Starting with the bottom and top rung help stabilize this section.
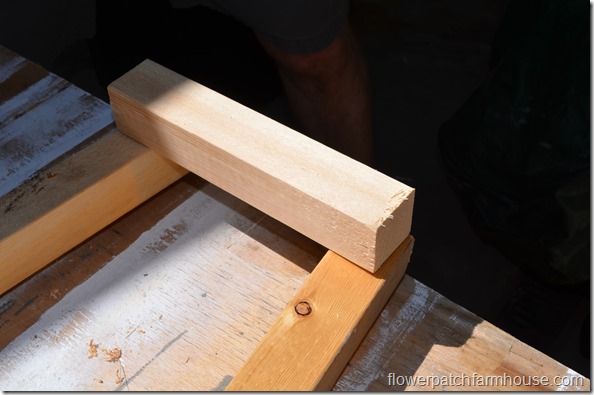
Note in the photo below how the rungs do not line up with the edge of the legs.
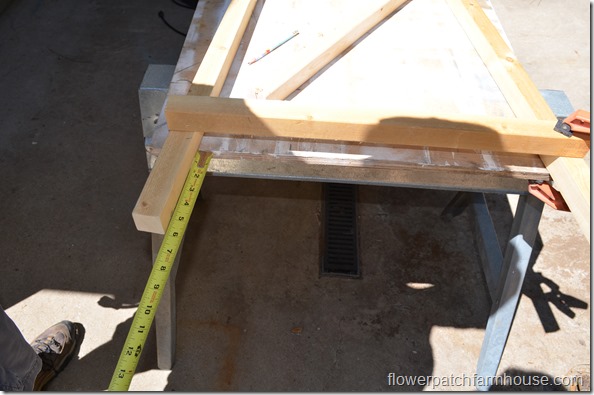
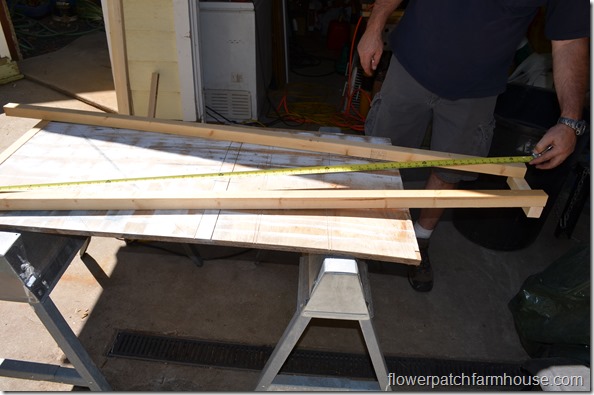
Check for square.
To check for square you take measurements on the diagonal and adjusting the legs until the measurements match as closely as possible.
This adjusting is called racking. This means you push on the corner that has the longer dimension (if they don't match already) by half the distance.
Example: If one side is 1/2″ longer push the corner a 1/4″ then remeasure (this is not an exact science but it will bring the obelisk closer to square). Keep racking until dimensions are equal or very close.
Evenly space rungs
Attach the rest of the rungs evenly spacing them. (you could space them unevenly if you wished this is just how we did it)
To evenly space them measure from the bottom of the lowest rung to the top of the top rung.
Divide that measurement by 4 to get placement of the rest of the rungs.
This one the rungs needed to be 16 1/4″ apart. Mark the spots to attach each rung.
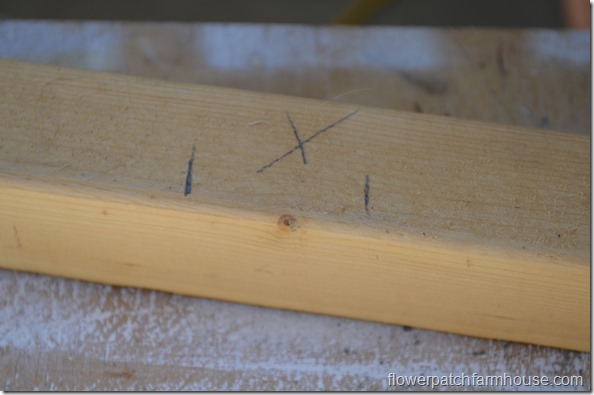
The measurements from the bottom rung is 16 1/4″, 32 1/2″, 48 3/4″
Now the first ladder should be built
The second side or ladder is much faster to build since you use the first as a template.
Lay out the parts on top of the first built ladder and just put it together.
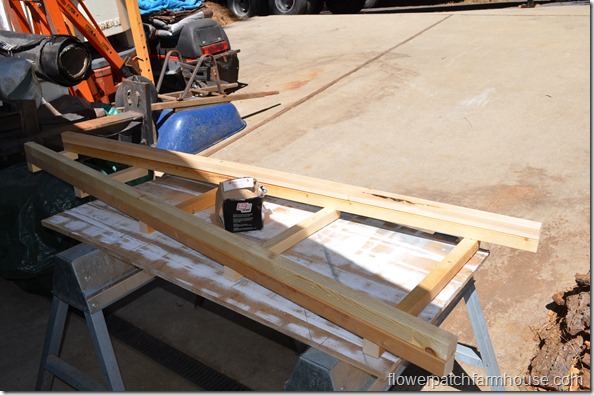
Lay the legs on top of the first ladder legs then attach the rungs matching the first ones and the second ladder will be complete. (you do not have to be exact)
Attach the side rungs of obelisk
Lay the ladders on their sides. Attach the side rungs following the layout of the rungs on the ladder pieces.
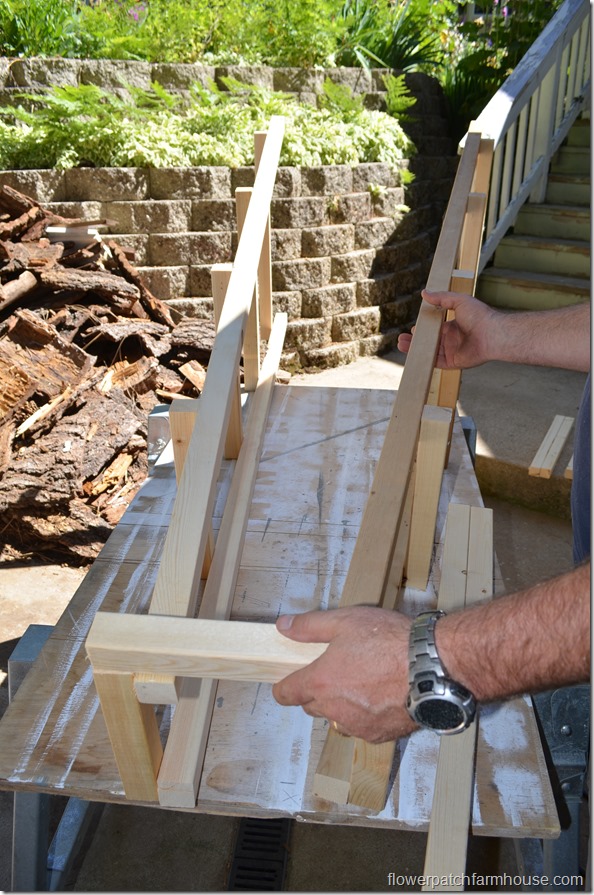
This is where you will see why the side rungs are 3 inches longer than the ladder rungs. They overlap the ends of the ladder rungs covering their ends.
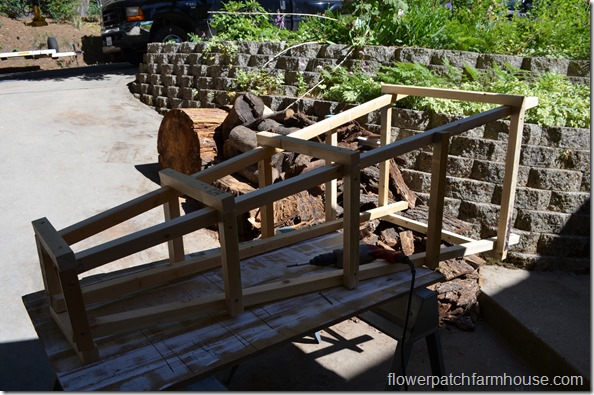
Flip the entire thing over and attach the remaining rungs.
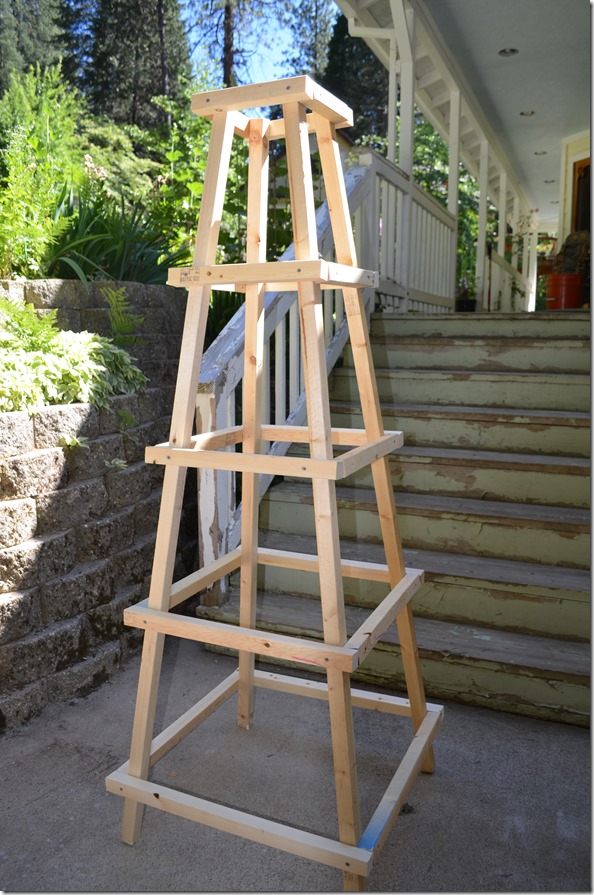
Finishing touches
On this particular obelisk the top is on the larger side. I wanted this so I could put something up there, even a potted plant.
There is so many ways you could add a finishing touch here. Find or cut out a silhouette of your favorite farm animal, put a windmill on it, or find a weather vane to attach.
You can paint this any color you wish or stain it. I used an organic tung oil on some of mine and it really helps them hold up for years even though it is built out of cheaper wood.
We built this one over 5 years ago and it is still in fantastic shape.
When we built this the price of the 2 x 2s at 8 feet long was $2.30 each and that was 5 years ago so I really do need to find out what they run now.
Prep Time 20 minutes
Active Time 2 hours
Additional Time 30 minutes
Total Time 2 hours 50 minutes
Estimated Cost $20
Materials
- 8 – 8 ft 2 x 2's (I think these are pine or fir)
- 3 inch wood screws
- exterior Wood Glue
Tools
- Miter saw
- Screw gun
Instructions
Cut 4 - 2 x 2's @ 72 inches long (legs)(you can adjust to height you wish)
Rungs for ladders:
2 @8 inches,
2 @11 5/8 inches,
2 @ 15 5/8 inches,
2 @19 3/4 inches,
2 @ 24 inches
Second set of rungs to attach ladders together:
2 @ 1 1 inches,
2 @ 14 5/8 inches,
2 @ 18 5/8 inches,
2 @ 22 3/4 inches,
2 @ 27 inches
Lay 2 of the 72 inch pieces on a flat table.
Measure up 6 inches from the bottom of both legs for placement of the bottom rung or crosspiece.
Pre-drill holes for screws. This will prevent splitting. Fasten the rung to the legs (24 inch piece).
Since the legs are at an angle and the cross pieces are cut square only line up the top corner to the edge of the leg.
Start with the top (8 inch piece) and bottom rung to stabilize this section.
Now attach your other cross pieces or rungs. Measure from the bottom of the bottom rung and the top of the top rung. Divide that measurement by 4 to get placements for the rungs. Ours were 16 1/4 inches apart.We marked the spots for each rung.
The placements of the rungs is from the bottom rung at 16 1/4", 32 1/2" 48 3/4" Now you should have your first ladder built.
Use the first one as a template. No measuring or figuring for the second ladder.
Lay the ladders on their sides to attach the side rungs.
This set of rungs are 3 inches longer than the ladder rungs, they will overlap the first set covering their ends.
Repeat for the other side.
Paint or finish with a protective oil/stain.
Notes
You can adjust the size as you wish.
Happy building!
Make sure you check out this super easy Arbor we built from this Obelisk Idea!
Want a downloadable pattern for the obelisk, just fill out this form to get access to all the Resource Library.
Press here to sign up.
More posts you will enjoy, check them out!
How to Grow Sweet Peas
Another obelisk design you will love!

If you enjoyed this Please PIN and share!
How To Build Garden Obelisk
Source: https://www.flowerpatchfarmhouse.com/easy-garden-obelisk/
Posted by: davisdorbacted.blogspot.com
0 Response to "How To Build Garden Obelisk"
Post a Comment